The ultimate guide to fly fishing knots
The do's and do-knot's fly fishing knot tying. Find out what you need to know, what you don't, and how to build your skills and have confidence in your fly fishing knots

Having confidence in your knots is crucial for successful fly fishing.
After casting, it's the number one thing you should work on to lower frustration and help you spend your time on the water fishing, not rigging.
And, as a bonus, it's an area where a beginner can build skills from the friendly confines of their couch or desk chair.
This guide will walk you through the essential knots you need to know, from connecting your backing to your reel all the way to tying on your fly.
Inside this lesson
- Why knots matter
- When knots fail
- The best knot-tying companion on the internet
- Essential knots for different fly fishing connections
- Practice techniques
- Troubleshooting common knot issues
- More knots to learn
- Putting a bow on it
Why knots matter
At the core of fly fishing is the cast, the transfer of energy from your body through a dynamic system designed to squeeze every ounce of energy you put in, to propel a tiny fly on a hair's-breadth of tippet connected to twenty-odd feet of plastic line.
Any basic trout rig has no fewer than five knots from the reel to the fly (OK, six, if you count the whip finish used to complete the fly). From the clinch knot connecting the fly to the tippet, to the double surgeon's loop connecting tippet to leader, you'll tie and retie several of these knots multiple times every trip.
But the importance of knots in fly fishing isn't just in that we have to frequently tie them.
It may sound fundamental, but it's worth stating clearly: We need our knots to work so we can successfully catch fish. We need them to be tied correctly to hold on to that special result we're after.
When knots fail
Every angler has lost a fish due to a failed knot.
Usually, it's something they'll dismiss as the fish's cause. "Wow, he broke me off!" But as you get accustomed to the limits of your tackle, you'll get a stronger sense of the size of fish you're catching earlier in the catching process. You'll see a fish take a fly, or feel it based on the aggressiveness of the strike and response. And you won't be able to make excuses for bad knots.
So, even if you make that excuse to your fishing partner, you'll know in your heart of hearts there was probably more breaking strength in that piece of tippet. It didn't have any nicks or wind knots in it. And that you rushed the riffle hitch to get the new fly back in the water. And you may feel great shame.
Knots fail for a lot of reasons. But knot theory—yes, a thing, a very cool thing—and the engineering limits of materials (the "pound test" ratings that come with every fishing line) only take us so to the edge of the lab.
Out in the real world, on the river or lake, there are more factors to consider.
They're not tied correctly
You have to follow all the steps. Practice so you're tying the knot correctly, according to the instructions.
Get enough muscle memory so you can do it both-handed as fishing conditions dictate (e.g. in the cold and wet, holding the fly in your left or right hand in the case of the Clinch Knot, etc.
They're not seated correctly
Most knots need moistening, otherwise the friction of that last tug you give to seat the knot will create weakness in the tippet material.
Put some spit or water in there. Use your thumbnail on the Clinch Knot to snug the knot down so there aren't any gaps in the wraps. The knot should not budge as you apply more pressure on it. Don't yank, as that'll often break off a lighter tippet (5x, 6x).
They're mechanically compromised
Oftentimes overzealous nipper action can create nicks on the actual working knot, by cutting the tag end too high up. Your cut on the tag end doesn't need to be perfect. If there's a millimeter of tag end left it won't hurt the knot or cause the fish to refuse it.
Check your knots when you snag, or when you catch a fish. Trout have sharp teeth and can abrade a knot or tippet section when they're caught.
They're chemically compromised
DEET in bug spray will melt your line systems. Keep it away from your gear at all costs. The jury's still out on sunscreen, too, and as general practice I try to make sure my hands are clean after applying to not get any on terminal tackle. The scent of sunscreen can cause its own problems, too.
Old knots, that have sat in the sun for a while, or just stiffened when the rod hangs in the garage over the winter, should be checked and / or retied if they seem in any way brittle. Don't be precious about reusing a leader from last season if it might be compromised.
The best knot-tying companion on the internet
I'm a visual learner when it comes to knots, so I like to see them tied a few different ways, in different orientations. That's why my favorite resource for practicing knot is the amazing Animated Knots by Grog.
It's got almost all the essential fly fishing knots and their variants articulated in a lot of different ways. Core to what makes Grog great is the interface where knots are visualized. You can flip the orientation horizontally or vertically, step through each knot piece by piece, and even set your autoplay speed, so the images can cycle slowly as you make the movements for the first time, then speed up as you get more practice.
Essential knots for different fly fishing connections
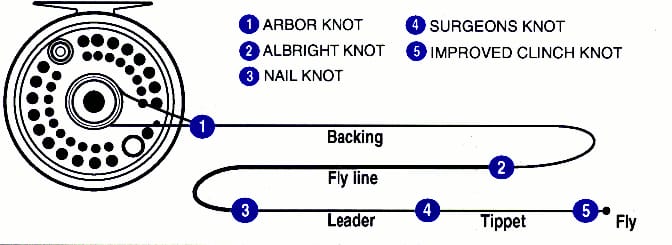
This isn't the best diagram, it's a bit outdated, but it'll give you a good sense of how the knots in your rigging system come together:

It'll help you understand, piece-by-piece, what goes where.
1. Reel to backing: Arbor Knot
When to use it: Use it to attach your backing to your reel, when first setting up your reel, or replacing your backing.
While you might not tie this one often, it's good to know. It's a fairly easy knot.
I have tied maybe three of these in my entire life, because usually the person in the fly shop that sells you the reel will have tied this for you, or the reel comes rigged from the manufacturer with this knot in place.
2. Backing to fly line: Bimini Twist
When to use it: Create a big loop in your backing to make it easier to swap your fly line for a different one
I don't use an Albright knot here, as indicated in the diagram. I use a Bimini Twist. Modern fly lines almost alway come with welded loops on the front and back, making connections easier—you just have to thread one loop through the other, and then the tag end back through.
A Bimini Twist in your backing is strong, and allows you to create a loop large enough that the reel fits through when you want to switch lines from, say, a sinking line to a floating line. You simply loosen the knot by pulling the backing out of the loop-to-loop out, then slide the reel through the loop. Do the opposite to attach then new line to the reel.
The Bimini Twist is a little complex to tie, but comes with practice. I like to pretend I'm rigging for marlin on a boat deck somewhere warm and use my toes.
If you're looking to attach an older fly line here, one that doesn't have a welded loop on the back, use the Albright Knot, or a Nail knot.
3. Fly line to leader: Perfection Loop
How to tie the Perfection Loop
When to use it: Create a loop in the end of a leader, when you're building your own leaders, replacing the butt section of a leader, or looking for a loop-to-loop connection
The Perfection Loop is crucial for creating strong, smooth connections between your fly line and leader. It's probably the third-most-frequently-tied knot in your arsenal.
The end of most modern leaders have these pre-tied Perfection Loops on the end that connect to the fly line. You just slide your leader loop into the fly line loop, and then bring the tapered tippet end around and pull through.
When you're connecting loops, make sure they're seated correctly in a handshake, like so:

Previously, anglers would use a Nail Knot to connect fly line to leader. Nail Knots can be tough to tie without a Nail Knot tool. If you're using an older fly line that doesn't come with a welded loop, you can buy a connection kit that allows you to add a welded loop, which will make this process a lot less ornery.
Those welded loop kits create a little bit of a hinge in your fly line, due to the added material, and can be tough to slide through the rod guides, so it might be time to get a newer line.
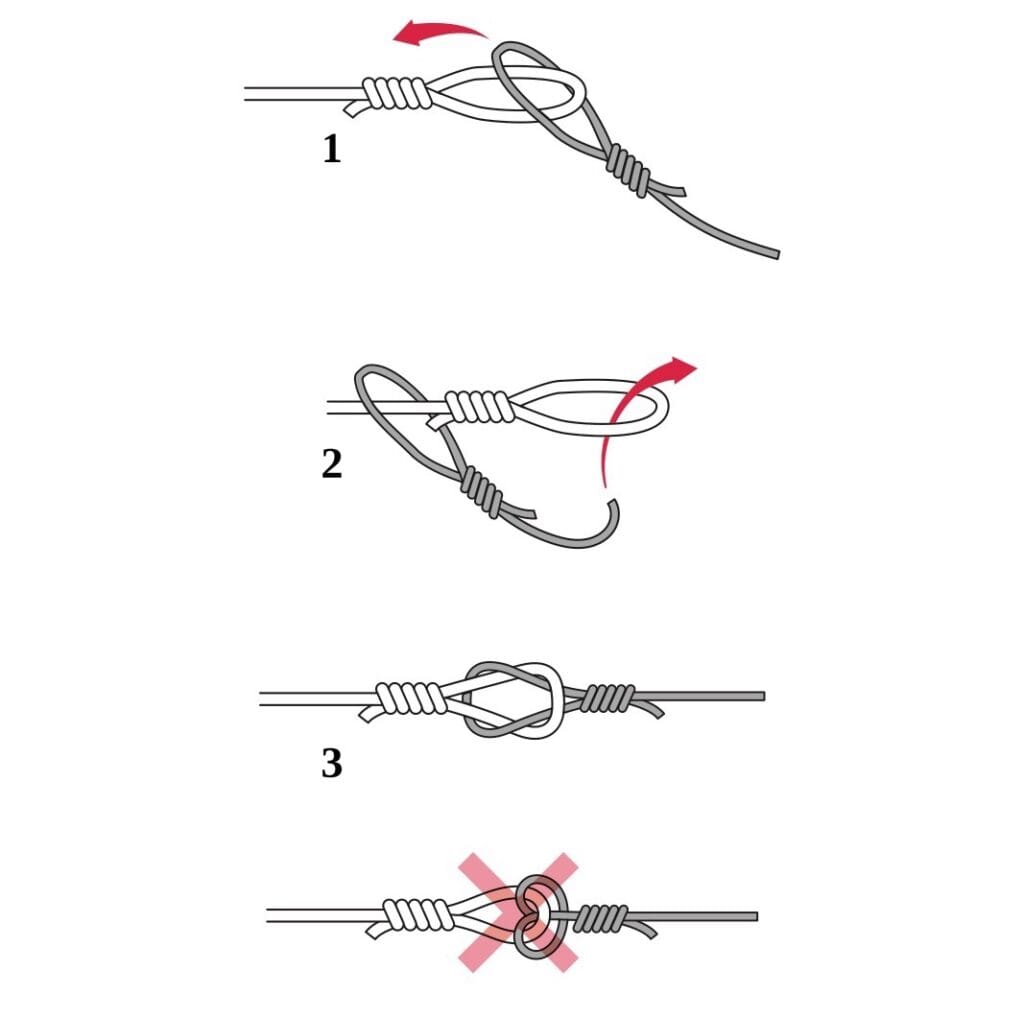
4. Leader to tippet: Surgeon's Knot
When to use it: Use a Surgeon's Knot, or Surgeon's Join, to connect two similar-diameter pieces of tippet, usually the end of your tapered leader with a new tippet section.
The Surgeon's Knot is versatile and easy to tie, making it perfect for connecting your leader to your tippet or adding additional tippet sections. It's essentially like tying an overhand knot, the one you use to begin your shoelaces. But passing the material through two times as opposed to just onece.
If you're connecting two pieces of tippet that are of dissimilar diameter like greater than 3 sizes difference, say 3x to 6x, (which is an uncommon connection) you may want a Blood Knot. They're a little stronger and cleaner. I take the time to use Blood Knots when I'm creating my own leaders at home, but usually on the river I opt for the simpler Surgeon's Knot.
5. Tippet to fly: Clinch Knot, or Improved Clinch Knot
How to tie the Improved Clinch Knot
When to use it: Use an Improved Clinch Knot to connect your tippet to your fly.
This is the knot you'll use most often: every time you change your fly. This is the one you need to know up and down, back to front.
You essentially thread the tippet through the eye of the hook, hold the loop open, twist the tag end around five or six times, then thread it back through the open loop, through the final loop, lube and cinch it up.
Practice techniques
The great part of knot-tying as a fly fishing skill is you can practice knots anywhere, at any time.

Here are a couple ways to get your skills up, so you're not trying to look at your phone or a printout from Grog on the water:
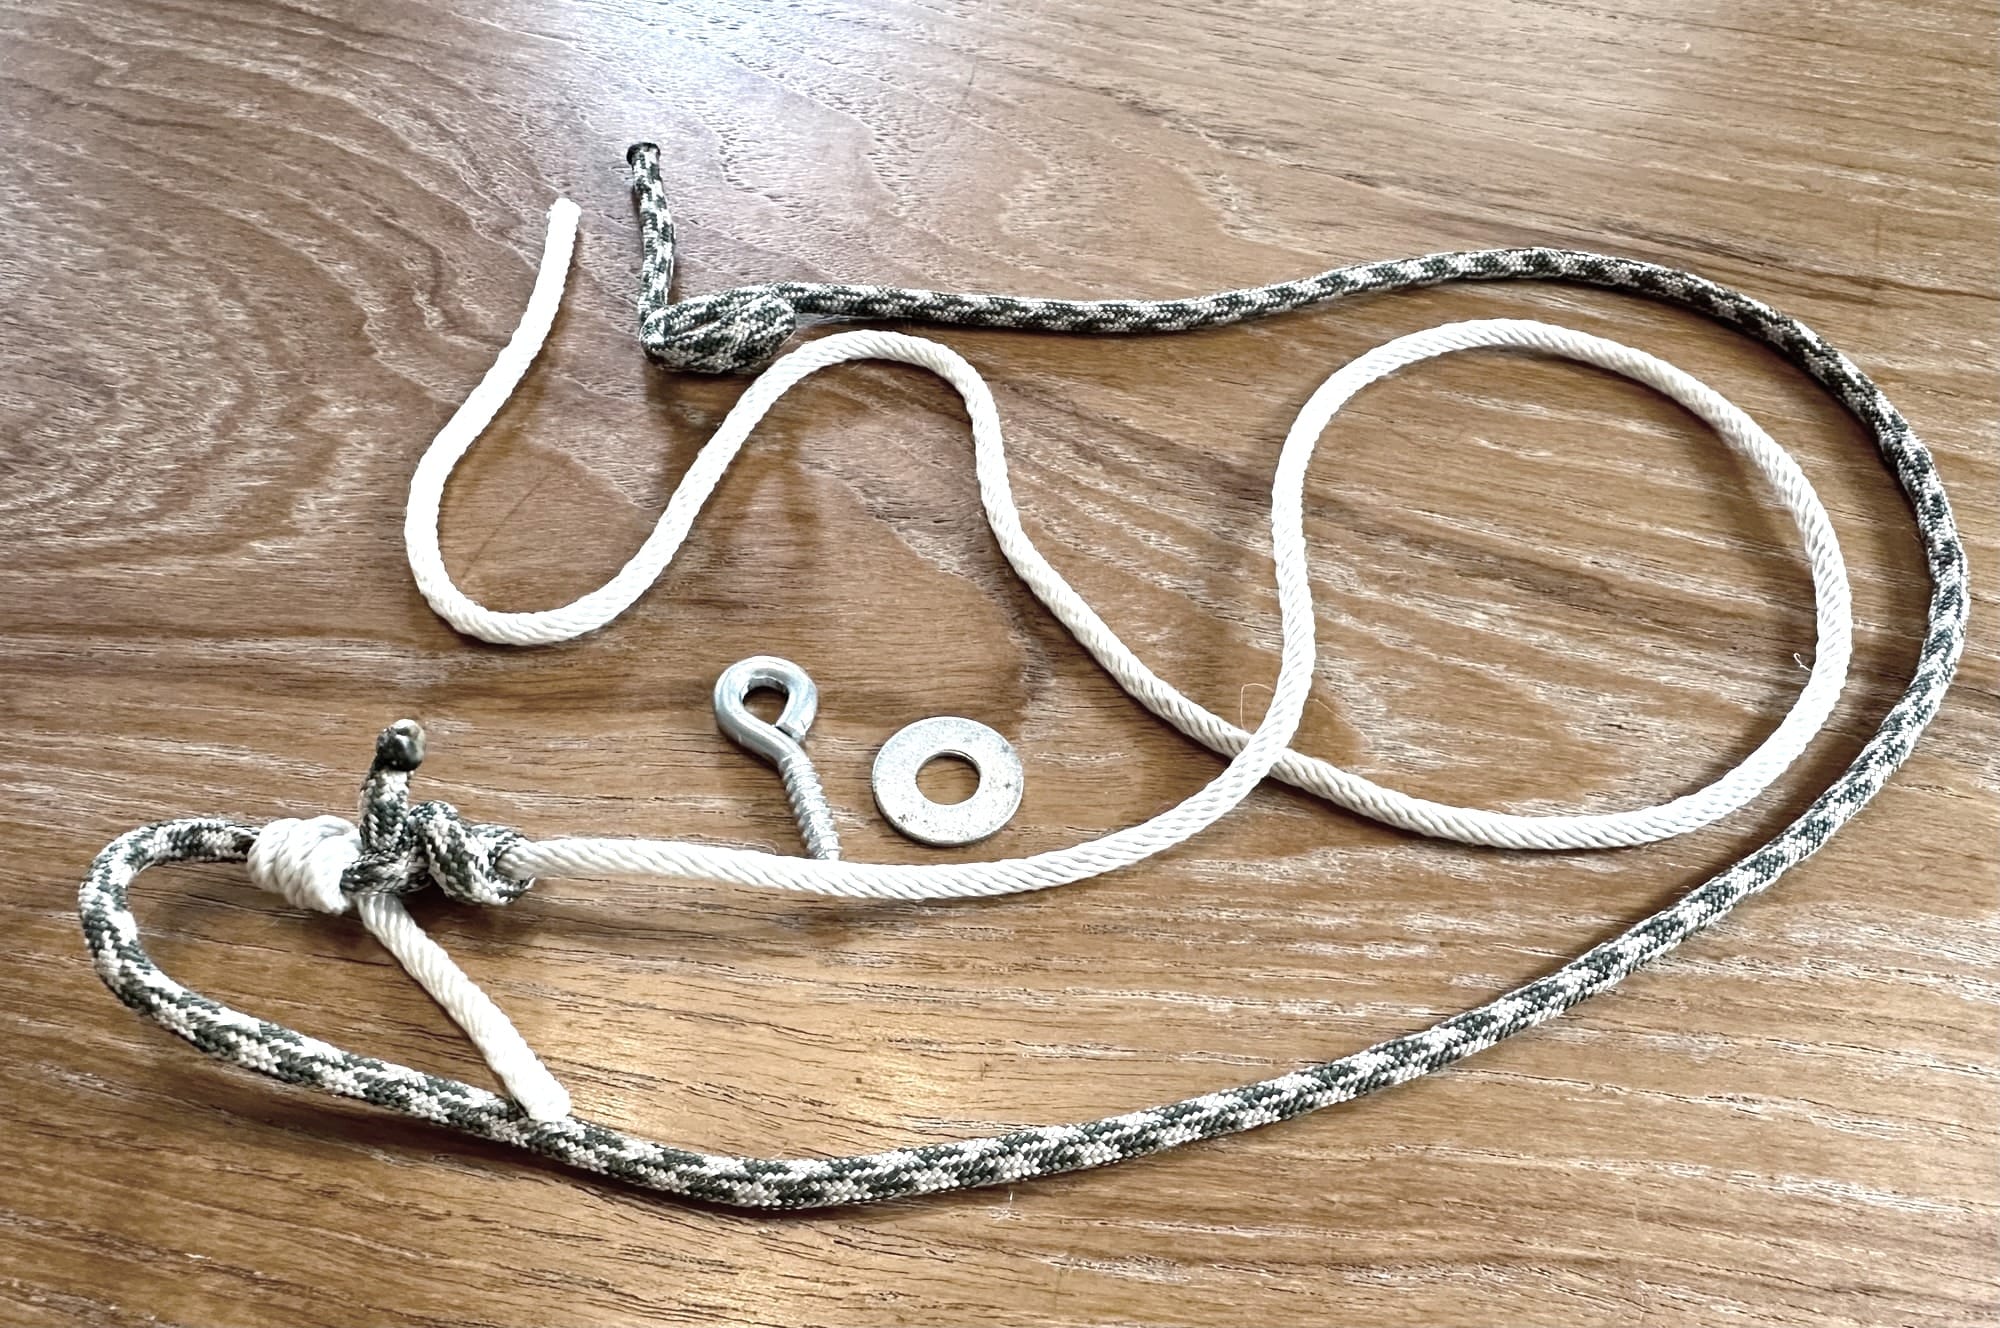
Use household items: Get a screw eye or a washer to imitate the eye of a hook, and use that to practice your clinch knots. It'll make it a lot easier to do that with the real thing, which will be much smaller.
- Try different materials: Have a few different pieces of paracord or nylon string, so you can work with different diameters and colors to see how knots come together.
- Make it a habit: My knot stuff is usually around my desk area, and it becomes a bit of a fidget when I'm on a Zoom meeting and need something to do with my hands.
- Give yourself some grace on the water: There's no shame in using magnifying aids, like bifocals, or the built-in magnetic hook holders, or fly threaders, to make attaching small flies easier.
Troubleshooting common knot issues
- Knot slipping: Ensure you've moistened the knot before tightening. This reduces friction and allows the knot to seat properly.
- Knot breaking: Check for abrasions on your line. Even small nicks can significantly weaken your line.
- Difficulty in low light: Practice tying knots with your eyes closed. This muscle memory will help when you're tying knots at dawn or dusk.
More knots to learn
As you progress, you might want to add these knots to your repertoire:
- Blood Knot
Connect two similarly-sized piece of line, a replacement for the above Surgeon's Knot, used with close widths of line (~.002” or 1-2X). Blood or Surgeon's is largely a matter of taste. Read about how the professionals come down on the whole affair. - Non-slip Mono Loop Knot
Tippet-to-hook, lets the fly flop around and adds action. A must for steelhead flies, and larger swung flies - Turle Knot
Connect tippet to a hook with an upturned eye, while swinging wet flies when you want the fly to provide more of the action. Add a Riffle Hitch to cock the fly at an angle and kick out a little more wake. - The Bowline
You should just know this one if you're going to be around water, a good all-around knot that doesn't slip. Use it for boat anchors, tying off to a tree, rigging a bear bag, whatever. Also the subject of one of the world's greatest sea chanties.
Putting a bow on it
The Germans have a great word that I learned from my buddy Noah (in a slightly different context). I find handy to think about how knot practice comes together: Fingerspitzengefühl. Finger tip feeling. Knowledge acquired through fiddling, and keeping your fingers in the vague pies of what's going on.
That's partly muscle memory. More figuratively, that's practicing and seeing enough knots tied to know where the parts need to go to be effective.
Everybody's brain works differently when it comes to knots. Some people learn best by feeling, others by seeing. Find what works for you and practice regularly.
When you're on the water with cold fingers or shaking with excitement over a potential catch, you'll be glad you put in the practice time.
What do you think, Blood or Surgeon's? What are your knot-tying tips? Tell us in the comments.
𓆟 𓆝 𓆟


